DonQui Oaty is quite excited to be flying British Airways First Class across the Atlantic. Not business class but real proper first class!
‘Will it be worth it?’ He wonders.
BA’s exclusive First Class check-in and security area at Heathrow
On arrival at London Heathrow terminal five he is whisked into the private First Class check-in with its own security screening area. With no queues DonQui thinks this is how flying should be like — no crowds and no stress.
The Concorde Lounge
The British Airways Concorde lounge is quite a step up from the usual business lounges.
So DonQui settles down comfortably with a glass of good Champagne and a few nibbles to await his flight in comfort.
The spacious first class cabin on boardThere is plenty of room for a Donkey with relatively short legs to stretch out and have a good snooze.
There are some seriously excellent wines on offer and the food it pretty good too.
Without a proper kitchen on board it is never going to be haute cuisine but they make a good stab at it.
‘So is it worth it?’
DonQui’s view is that it all depends on what you pay. First class is marginally better than business class on board but the private check-in and superior lounge makes it much better. Bear in mind that these will not be available at all airports.
Having now flown across the Atlantic on every class of BA cabin, his assessment is as follows:
Economy is no better and no worse than other airlines — long queues, cramped seats and rubbish food.
The BA premium economy cabin
Premium economy is a big step up for not that much more money. With much more spacious seating and better food it begins to turn the flight into a moderately pleasant experience.
DonQui buckles up in business class to enjoy a good night’s sleep
The big advantage of business class is the flat bed seat which allows for a proper sleep. You also get lounge access and priority boarding. The problem is that the cost can be be double or more that of premium economy.
DonQui prefers to book premium economy and snap up any upgrade offers if available as a full price business class seat is probably not worth the price differential.
The first class seat takes up twice the space of a business class seat
The First Class experience is very pleasant but it is not significantly enough of an improvement on business class to warrant the sometimes eye-watering full ticket prices. It is really only worth it is you get a really good deal, or use air miles to get an upgrade which is what DonQui did in this case.
Cumberland Sauce is a traditional English accompaniment for a Christmas goose or ham. It also goes well with game. These days it has largely been supplanted by cranberry sauce which, like turkey, is an American import.
DonQui likes cranberry sauce with turkey. A couple of years back he described his recipe for a simple homemade cranberry sauce.
This year DonQui will be having ham (gammon joint) on Christmas eve and he wants to try his hand at making Cumberland sauce to go with it.
This is his recipe:
Ingredients:
½ lemon, zest and juice
½ orange, zest and juice
4 tablespoons, redcurrant jelly
a good splash of port wine
½ teaspoon ground ginger
1 teaspoon cornflour
Note: Traditionally Cumberland sauce is made with mustard. DonQui has a mild allergy to mustard so he leaves it out, using instead the cornflour to bind and thicken the sauce. If you like mustard then leave out the cornflour and use a good teaspoon of mustard instead.
Method
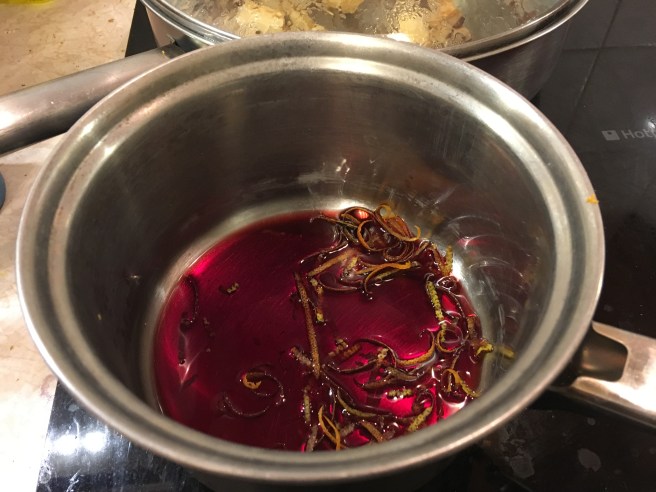
Warm up the orange and lemon zest in the port, letting it reduce slightly
Add the redcurrant jelly and whisk it in over a low heat until the jelly had completely melted and it is blended with the port.
Put the ginger and cornflour (or mustard) in a small glass or bowl. Gradually add the orange and lemon juice. blend it together until well mixed.
Add the juice mixture to the pot and bring it slowly to the boil, whisking it as you do so that it is nicely blended.
Remove from the heat and pour into a serving jug.
There you have it.
Essentially Cumberland sauce is jazzed up redcurrant jelly. The ginger and citrus zest/juice gives it a real Christmassy flavour. DonQui tries it out with venison and it goes perfectly. He is looking forward to trying it again with his Christmas eve ham.
Christmas is still a few days away but DonQui Oaty is working on perfecting his stuffing recipe which he previously described for his Canadian Thanksgiving feast.
He thinks he has really perfected it now so here is is recipe for stuffing a Christmas bird, be it a turkey or (his favourite) a goose.
Ingredients
Two chicken livers, or one turkey or goose liver, chopped
Two teaspoons of sausage meat (If you cannot get sausage meat from your butcher then simply cut the skin off a sausage and use the inside filling)
Half an onion finely chopped
A good bunch of chopped parsley (about ½ a cup)
½ teaspoon of dried rosemary
½ teaspoon of dried thyme
A bit of grated nutmeg
zest of ½ a lemon
3 slices of stale white bread cut into squares leaving crusts on
a handful of chopped dried cranberries (optional)
a handful of chopped chestnuts (optional)
a splash of milk
a splash of chicken stock (or water)
salt and pepper to taste
butter for cooking (mix with a little vegetable oil if desired)
Method
Gently pan fry the onion in butter until it softens and begins to colour
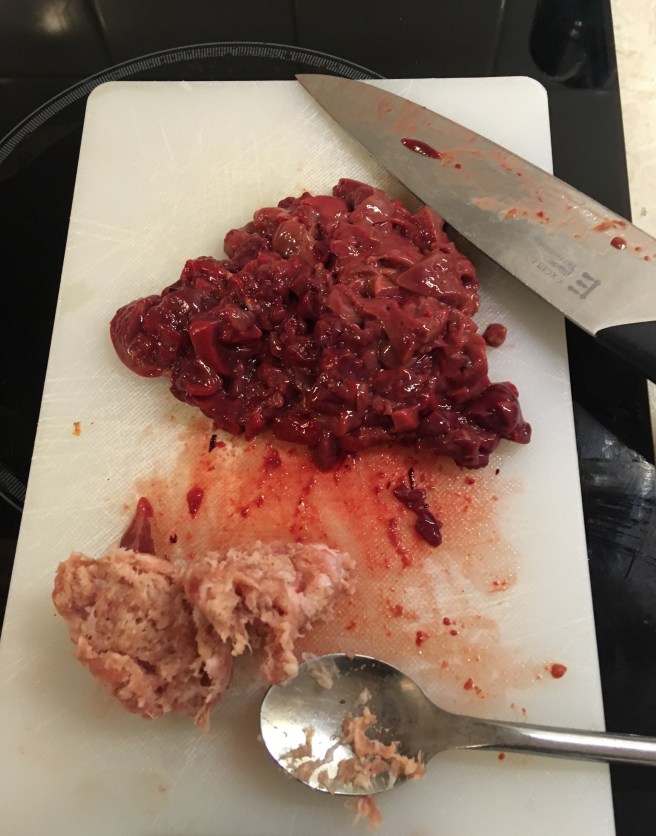
Add the chopped livers and sausage meat. Stir fry over a low heat until the pinkness is gone.
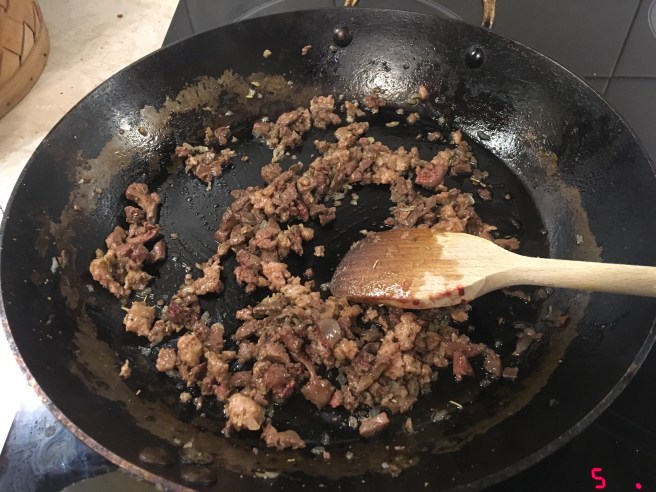
Add the herbs, nutmeg, lemon zest, cranberries, chestnuts, salt and pepper and continue cooking over a low heat until well mixed.
Add a splash of chicken stock or water to moisten. Then set aside to cool.
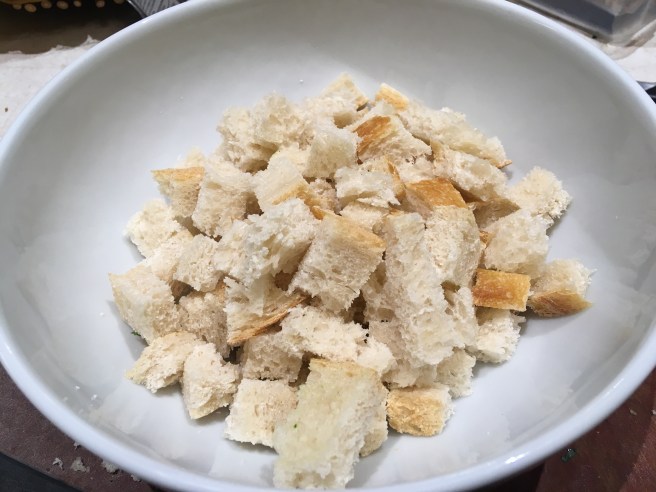
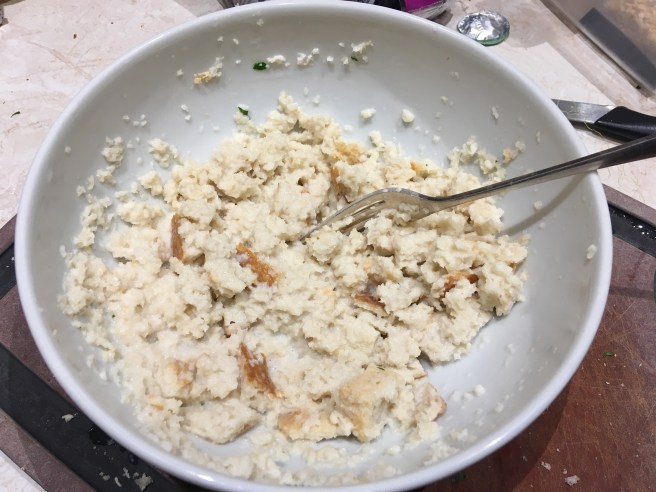
Break the bread up into chunks. If you prefer a smoother stuffing you can use soft breadcrumbs instead, or whizz the bread chunks in a food processor to make the same.
Moisten the bread with a little milk and mash it up with a fork until it becomes dough-like but not too soggy, If it seems a little too liquid you can squeeze out any excess milk with your hands.
Mix in the meat/onion/herb mixture along with the cranberries and chestnuts if you are using them.
DonQui finds that cranberries and chestnuts give a real Christmassy feel. They add a delightful taste burst and a bit of crunch to the finished stuffing. .
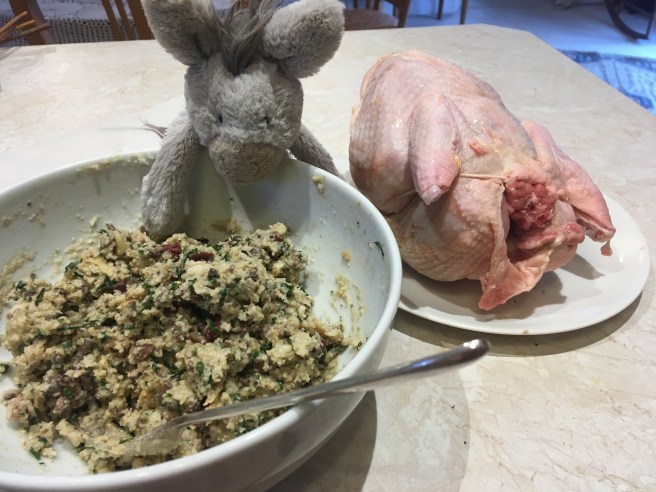
When it is throughly mixed it should have the look and constituency of a course paté. Cover and put in the fridge overnight.
The following day stuff the neck end (the ‘back’ ) of the bird.
Draw the flap of skin over the stuffed end and secure with a couple of cocktail sticks.
Today, DonQui is stuffing a small chicken which gives him lots of left-over stuffing (there will be less left over with a larger Christmas turkey or goose). He forms the left over mixture into 2 inch balls with his hooves well coated in olive oil. The balls will only need 20-25 minutes baking in a hot oven and will be dryer and crispier than the moist stuffing inside the bird.
DonQui prefers the moister internal stuffing but some prefer the stuffing balls.
DonQui is pleased that he has just about mastered the art of making a good pizza base but what about the toppings? DonQui’s current favourites are tomato sauce, mozzarella cheese, basil, olives, capers and anchovies.
While he will vary these from time to time, the key is the tomato sauce.
DonQui Oaty admires his handiwork
This is how he makes it:
Ingredients for 2 individual pizzas
1 400 g tin of San Marzano tomatoes
a pinch of salt
1 crushed garlic clove (optional)
a bunch of herbs — basil or oregano (optional)
San Marzano tomatoes are a unique southern Italian variety grown on the slopes of Mt Vesuvius near Naples. They are meatier than most other varieties with less seeds and less acidity. They, therefore, make perfect pasta and pizza sauces. Even though tinned, the taste is so sweet and fresh that DonQui prefers not to pre-cook it before putting it on his pizza.
DonQui orders his from Amazon and although more expensive than normal plum tomatoes they are not a hugely extravagant purchase.
DOP San Marzano tomatoes
The variety is protected in the EU by the denominazione di origine controllata (DOC). This protection does not extend to some non-EU countries. In the USA many of the canned tomatoes sold as ‘San Marzano’ (often at very high prices) are nothing like the real thing.
Method
Gently fry the crushed garlic
If using garlic (he does not always add it), DonQui likes to gently fry it in olive oil until it becomes fragrant but before it colours. This takes down the pungent rawness that can be a bit overpowering in a sauce.
Drained tomatoes, salt, herbs and garlic in the blender
Drain the tomatoes and put them in a food processor/blender along with the salt and any herbs. If using basil you can use stalks as well as leaves. Add the garlic along with the oil it was cooked in.
The blended mixture
Whizz it all up until it is blended. It does not have to be completely smooth.
If you do not have, or do not want to use, a food processor you can crush the ingredients together with a mortar and pestle.
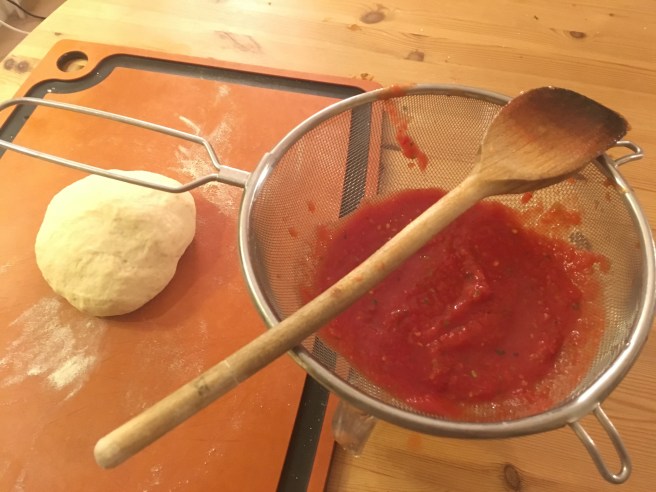
Drain the mixture to make it thicker
Tip the mixture into a strainer to drain a little more. If the sauce is too watery then it may make a thin dough crust a bit soggy. You could thicken it up with a bit of concentrated tomato purée (tomato paste) but this will alter the taste as the highly processed concentrate can take away from the fresh taste of the San Marzano tomatoes.
Spread the tomato sauce over the pizza base with the back of a wooden spoon.
Add your favourite toppings and put in the pre-heated oven at maximum temperature (250º+), ideally on a pizza stone (which radiates the heat). Then bake for 6 minutes or until the cheese is nicely melted and bubbling but before it burns.
Can there be any food be any food more completely perfect than pizza? DonQui Oaty thinks not. Therefore he has decided to learn how to make it himself from scratch.
Two Magpies Bakery, Southwold, Suffolk, England
DonQui’s first step is a pizza-making course at the Two Magpies bakery in Southwold, Suffolk. Well known for miles around for its incomparable breads and pastries the Two Magpies has extended its sourdough know-how into pizza making. DonQui is keen to learn more.
The evening course begins with a discussion about flour, sourdough and pizza. DonQui learns the importance of ‘hard flour’ with a high gluten content. This is essential to achieve the elasticity needed for a good pizza base. Using sourdough rather than yeast is a slower and better leavening process that alleviates the problems some people have with gluten. Then it is into the bakery to learn how to make and work the dough.
Working the dough
He works the dough feeling how, with kneading, it turns from a sticky ‘shaggy dough’ into a smooth, elastic mass. After leaving it for 20 minutes the elasticity increases and he kneads it some more. He learns that resting is important because immediately after kneading some of the elasticity is lost. Like muscles strained after a run, it needs rest to strengthen.
When the dough can be gently pulled apart without breaking it is ready to be formed. DonQui learns that the way to do this is too gradually stretch it out — not by rolling it with a rolling pin.
Forming the cornicione
The first step is to take a 250g ball of dough, gently flatten it out on a board (lightly floured to prevent sticking) and press around the edges to create the cornicione or edge.
Then slowly stretch the base out as thinly as possible, careful not to break it. Holding it up over two fists to let the edges fall down while gently turning is a good way of doing this, if feeling confident one could toss it up into the air and spin it around like a professional pizzaiolo. DonQui has yet to master this skill.
Cooking with the benefit of a baker’s oven
With the benefit of adult supervision and a blistering hot professional baker’s oven (350º+), DonQui’s first pizza is a great success.
DonQui’s first pizza is a great success
His first attempts to try this at home are OK but not brilliant. The base ends up a bit ‘doughy’ rather than light and crisp.
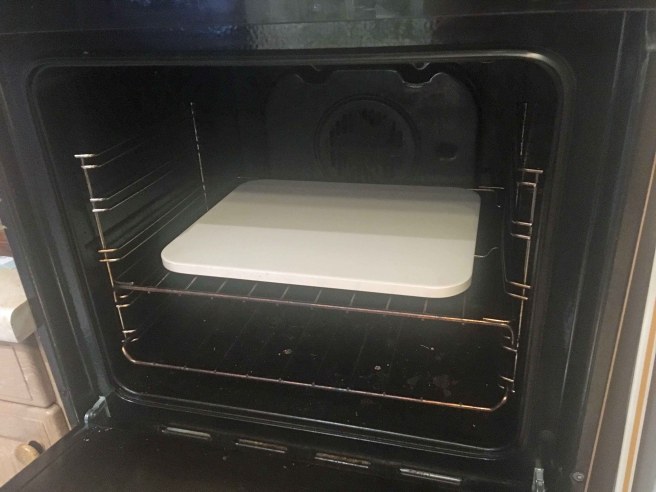
A pizza stone in a home oven can help to form a crispy base
Even with the addition of a pizza stone, his home oven with maximum temperature of 250º does not quite do the job.
Blind baking the base helps when using a low-temperature home oven
With further experimentation he finds ways to overcome this. Blind baking the base for 3 minutes before putting on the toppings is his first break-through. This gives a crispy crust at the lower temperature of his home oven. Adding a small amount of dried yeast as well as sourdough levain aids rising and makes the base lighter.
Italian strong, fine, flour transforms DonQui’s dough
Perfection, however, is only achieved when he tries using strong Italian 00 (super-fine) semolina flour. This flour — made especially for pasta and pizza — utterly transforms the dough. It is almost immediately elastic and the resultant base is as good as he has ever tasted anywhere.
DonQui contemplates the task ahead
Here, below, is DonQui’s recipe based on the Two Magpie’s original instructions with his own modifications.
It makes two small individual pizzas or a single large one.
Ingredients
250g strong white bread flour
½ teaspoon dried yeast
140g water
95g sourdough levain (starter)
5g salt (a good teaspoonful)
10g olive oil
Method
The ‘shaggy dough’ is a sticky mess, With kneading it firms up
Combine the flour, yeast, water and levain by hand into a shaggy dough.
DonQui’s sourdough levain
Turn onto a lightly floured surface and knead until a smooth non-sticky dough has formed.
The formerly shaggy dough is strong and smooth after kneading
Add salt and continue kneading until all granular traces have gone. Slowly add the oil and work it in until fully incorporated and the dough is smooth and strong.
Two hours later it looks like this
Leave the dough to rise for 2 hours in a lightly oiled, covered container at warm room temperature (22-27ºC).
Separating into two portions
Cut the dough in half (makes approximately two 250g portions). Shape each into a tight ball and either use immediately or wrap in cling film and refrigerate for a maximum of 48 hours. The dough balls can also be frozen.
To use, bring the dough back up to room temperature (if refrigerated), work it a few times to check elasticity by gently stretching and folding. It should be possible to do so without the dough immediately breaking apart.
The stretched dough on baking parchment
Let rest for 20 minutes then stretch into shape on a lightly floured surface. The final stretch is best done on parchment paper so that the base does not end up sticking to the board.
Blind bake at maximum temperature in a pre-heated oven (250º C at least) for 2-3 minutes on the parchment paper. Using a pizza stone will give a crispy base but be sure to put the stone in a cold oven or it will crack.
Remove from the parchment paper. Put on toppings when cooled.
Bake at maximum temperature for 6 minutes directly on the pizza stone. This will give a crispier finish than if it was left on the paper.
DonQui is most pleased with what he has baked
The flour
Pizza dough is best made with Italian Tipo ‘00’ durum wheat flour. It is finer ground than normal and has a high gluten content. It will give the dough an incredibly smooth, firm, texture.
Canadian flour has high gluten
If using white bread flour, make sure it is a strong one that’s high in gluten. It is the high gluten which gives the essential firm elasticity. Look for Canadian flour which has a higher gluten content than most European ones. Normal all-purpose flour will simply not do the job.
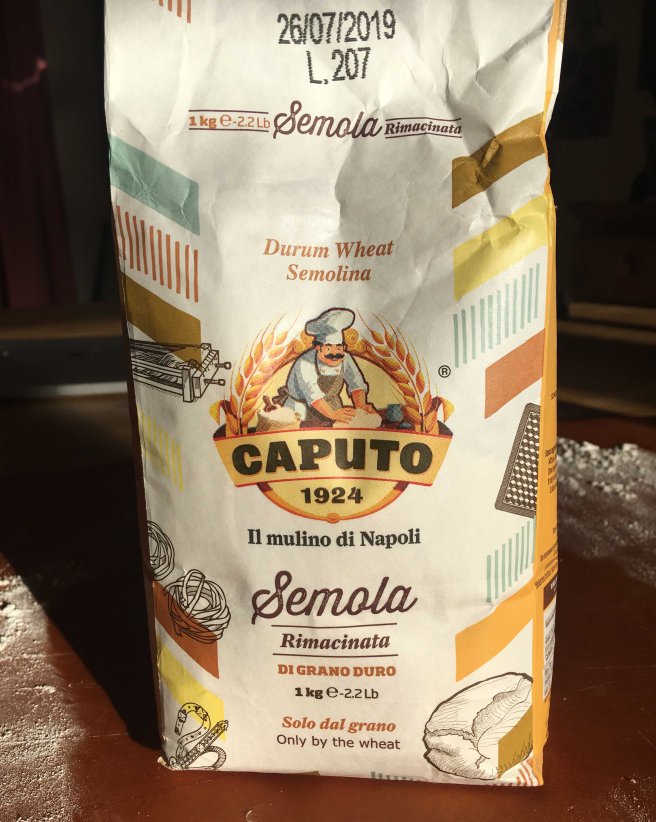
Pizza and pasta flour
Some millers in the UK are now producing pizza flour which combines Italian style fine grind with local high gluten wheat.