Cumberland Sauce is a traditional English accompaniment for a Christmas goose or ham. It also goes well with game. These days it has largely been supplanted by cranberry sauce which, like turkey, is an American import.
DonQui likes cranberry sauce with turkey. A couple of years back he described his recipe for a simple homemade cranberry sauce.
This year DonQui will be having ham (gammon joint) on Christmas eve and he wants to try his hand at making Cumberland sauce to go with it.
This is his recipe:
Ingredients:
½ lemon, zest and juice
½ orange, zest and juice
4 tablespoons, redcurrant jelly
a good splash of port wine
½ teaspoon ground ginger
1 teaspoon cornflour
Note: Traditionally Cumberland sauce is made with mustard. DonQui has a mild allergy to mustard so he leaves it out, using instead the cornflour to bind and thicken the sauce. If you like mustard then leave out the cornflour and use a good teaspoon of mustard instead.
Method
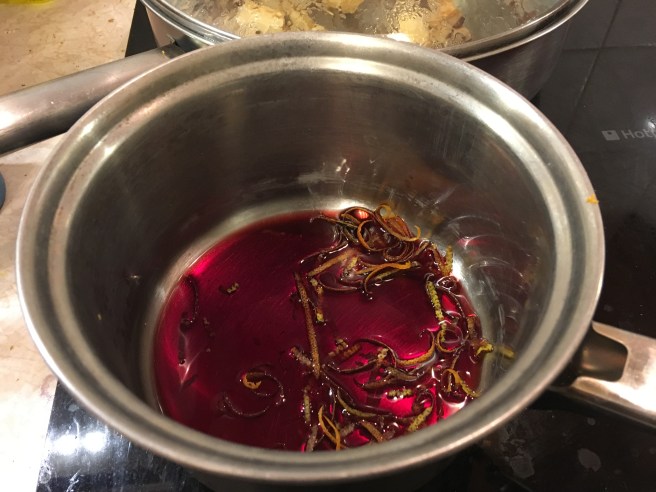
Warm up the orange and lemon zest in the port, letting it reduce slightly
Add the redcurrant jelly and whisk it in over a low heat until the jelly had completely melted and it is blended with the port.
Put the ginger and cornflour (or mustard) in a small glass or bowl. Gradually add the orange and lemon juice. blend it together until well mixed.
Add the juice mixture to the pot and bring it slowly to the boil, whisking it as you do so that it is nicely blended.
Remove from the heat and pour into a serving jug.
There you have it.
Essentially Cumberland sauce is jazzed up redcurrant jelly. The ginger and citrus zest/juice gives it a real Christmassy flavour. DonQui tries it out with venison and it goes perfectly. He is looking forward to trying it again with his Christmas eve ham.
Christmas is still a few days away but DonQui Oaty is working on perfecting his stuffing recipe which he previously described for his Canadian Thanksgiving feast.
He thinks he has really perfected it now so here is is recipe for stuffing a Christmas bird, be it a turkey or (his favourite) a goose.
Ingredients
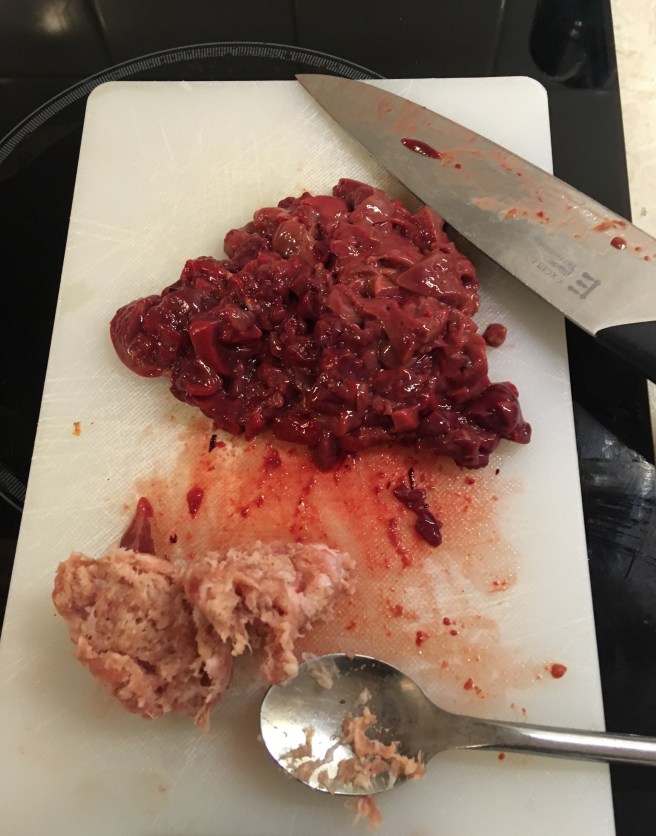
Two chicken livers, or one turkey or goose liver, chopped
Two teaspoons of sausage meat (If you cannot get sausage meat from your butcher then simply cut the skin off a sausage and use the inside filling)
Half an onion finely chopped
A good bunch of chopped parsley (about ½ a cup)
½ teaspoon of dried rosemary
½ teaspoon of dried thyme
A bit of grated nutmeg
zest of ½ a lemon
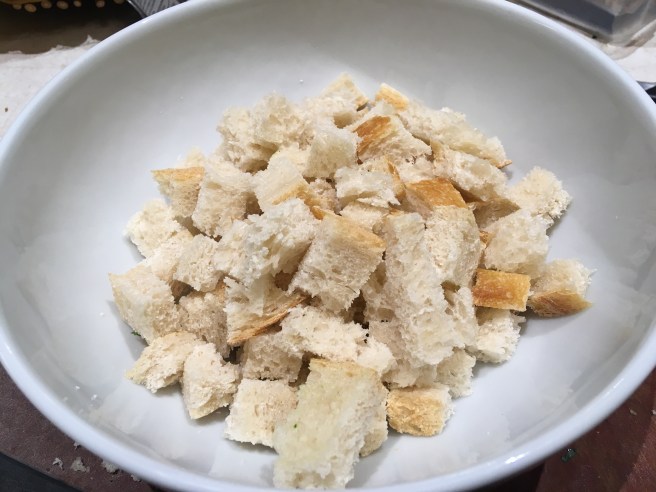
3 slices of stale white bread cut into squares leaving crusts on
a handful of chopped dried cranberries (optional)
a handful of chopped chestnuts (optional)
a splash of milk
a splash of chicken stock (or water)
salt and pepper to taste
butter for cooking (mix with a little vegetable oil if desired)
Method
Gently pan fry the onion in butter until it softens and begins to colour
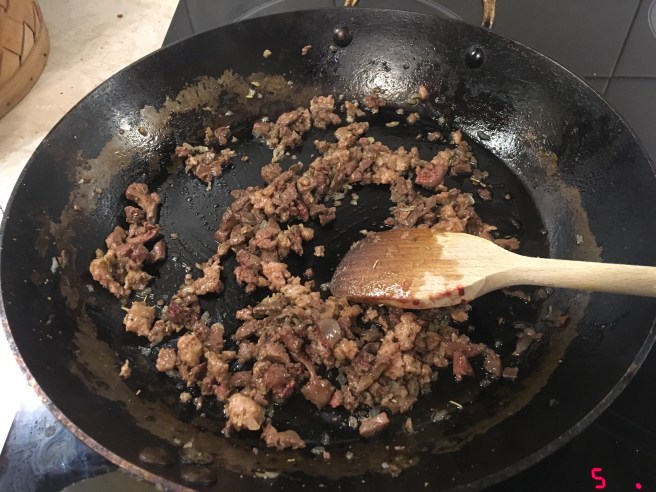
Add the chopped livers and sausage meat. Stir fry over a low heat until the pinkness is gone.
Add the herbs, nutmeg, lemon zest, cranberries, chestnuts, salt and pepper and continue cooking over a low heat until well mixed.
Add a splash of chicken stock or water to moisten. Then set aside to cool.
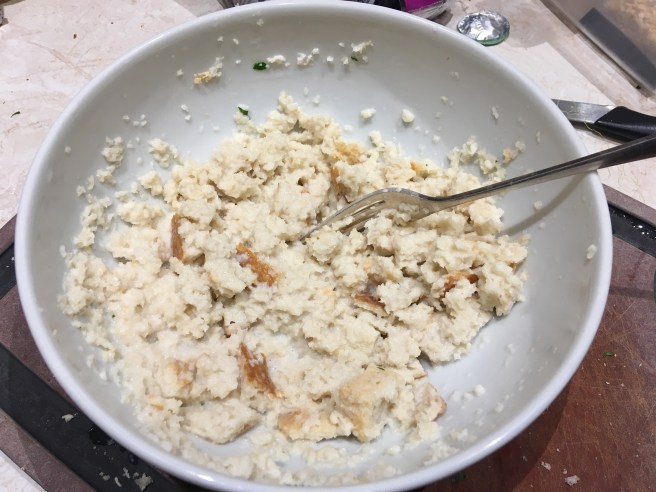
Break the bread up into chunks. If you prefer a smoother stuffing you can use soft breadcrumbs instead, or whizz the bread chunks in a food processor to make the same.
Moisten the bread with a little milk and mash it up with a fork until it becomes dough-like but not too soggy, If it seems a little too liquid you can squeeze out any excess milk with your hands.
Mix in the meat/onion/herb mixture along with the cranberries and chestnuts if you are using them.
DonQui finds that cranberries and chestnuts give a real Christmassy feel. They add a delightful taste burst and a bit of crunch to the finished stuffing. .
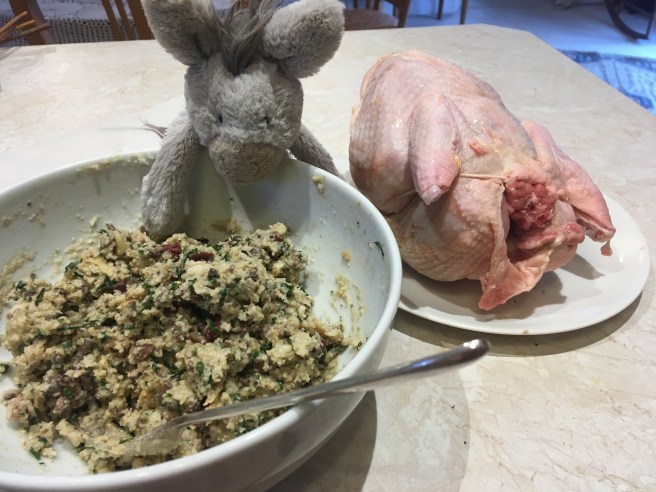
When it is throughly mixed it should have the look and constituency of a course paté. Cover and put in the fridge overnight.
The following day stuff the neck end (the ‘back’ ) of the bird.
Draw the flap of skin over the stuffed end and secure with a couple of cocktail sticks.
Today, DonQui is stuffing a small chicken which gives him lots of left-over stuffing (there will be less left over with a larger Christmas turkey or goose). He forms the left over mixture into 2 inch balls with his hooves well coated in olive oil. The balls will only need 20-25 minutes baking in a hot oven and will be dryer and crispier than the moist stuffing inside the bird.
DonQui prefers the moister internal stuffing but some prefer the stuffing balls.
DonQui is pleased that he has just about mastered the art of making a good pizza base but what about the toppings? DonQui’s current favourites are tomato sauce, mozzarella cheese, basil, olives, capers and anchovies.
While he will vary these from time to time, the key is the tomato sauce.
DonQui Oaty admires his handiwork
This is how he makes it:
Ingredients for 2 individual pizzas
1 400 g tin of San Marzano tomatoes
a pinch of salt
1 crushed garlic clove (optional)
a bunch of herbs — basil or oregano (optional)
San Marzano tomatoes are a unique southern Italian variety grown on the slopes of Mt Vesuvius near Naples. They are meatier than most other varieties with less seeds and less acidity. They, therefore, make perfect pasta and pizza sauces. Even though tinned, the taste is so sweet and fresh that DonQui prefers not to pre-cook it before putting it on his pizza.
DonQui orders his from Amazon and although more expensive than normal plum tomatoes they are not a hugely extravagant purchase.
DOP San Marzano tomatoes
The variety is protected in the EU by the denominazione di origine controllata (DOC). This protection does not extend to some non-EU countries. In the USA many of the canned tomatoes sold as ‘San Marzano’ (often at very high prices) are nothing like the real thing.
Method
Gently fry the crushed garlic
If using garlic (he does not always add it), DonQui likes to gently fry it in olive oil until it becomes fragrant but before it colours. This takes down the pungent rawness that can be a bit overpowering in a sauce.
Drained tomatoes, salt, herbs and garlic in the blender
Drain the tomatoes and put them in a food processor/blender along with the salt and any herbs. If using basil you can use stalks as well as leaves. Add the garlic along with the oil it was cooked in.
The blended mixture
Whizz it all up until it is blended. It does not have to be completely smooth.
If you do not have, or do not want to use, a food processor you can crush the ingredients together with a mortar and pestle.
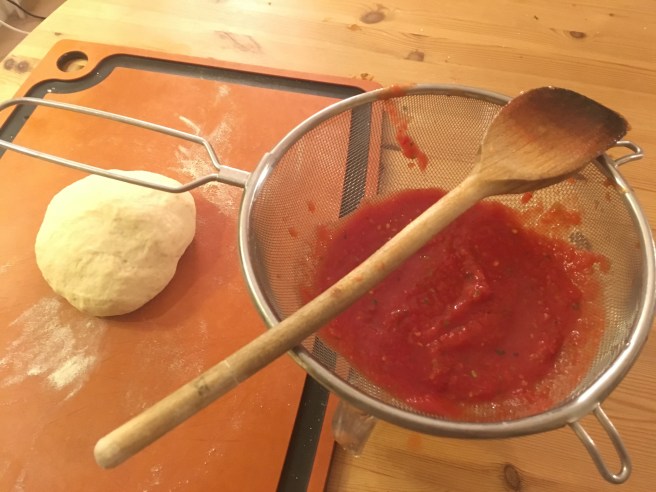
Drain the mixture to make it thicker
Tip the mixture into a strainer to drain a little more. If the sauce is too watery then it may make a thin dough crust a bit soggy. You could thicken it up with a bit of concentrated tomato purée (tomato paste) but this will alter the taste as the highly processed concentrate can take away from the fresh taste of the San Marzano tomatoes.
Spread the tomato sauce over the pizza base with the back of a wooden spoon.
Add your favourite toppings and put in the pre-heated oven at maximum temperature (250º+), ideally on a pizza stone (which radiates the heat). Then bake for 6 minutes or until the cheese is nicely melted and bubbling but before it burns.
Can there be any food be any food more completely perfect than pizza? DonQui Oaty thinks not. Therefore he has decided to learn how to make it himself from scratch.
Two Magpies Bakery, Southwold, Suffolk, England
DonQui’s first step is a pizza-making course at the Two Magpies bakery in Southwold, Suffolk. Well known for miles around for its incomparable breads and pastries the Two Magpies has extended its sourdough know-how into pizza making. DonQui is keen to learn more.
The evening course begins with a discussion about flour, sourdough and pizza. DonQui learns the importance of ‘hard flour’ with a high gluten content. This is essential to achieve the elasticity needed for a good pizza base. Using sourdough rather than yeast is a slower and better leavening process that alleviates the problems some people have with gluten. Then it is into the bakery to learn how to make and work the dough.
Working the dough
He works the dough feeling how, with kneading, it turns from a sticky ‘shaggy dough’ into a smooth, elastic mass. After leaving it for 20 minutes the elasticity increases and he kneads it some more. He learns that resting is important because immediately after kneading some of the elasticity is lost. Like muscles strained after a run, it needs rest to strengthen.
When the dough can be gently pulled apart without breaking it is ready to be formed. DonQui learns that the way to do this is too gradually stretch it out — not by rolling it with a rolling pin.
Forming the cornicione
The first step is to take a 250g ball of dough, gently flatten it out on a board (lightly floured to prevent sticking) and press around the edges to create the cornicione or edge.
Then slowly stretch the base out as thinly as possible, careful not to break it. Holding it up over two fists to let the edges fall down while gently turning is a good way of doing this, if feeling confident one could toss it up into the air and spin it around like a professional pizzaiolo. DonQui has yet to master this skill.
Cooking with the benefit of a baker’s oven
With the benefit of adult supervision and a blistering hot professional baker’s oven (350º+), DonQui’s first pizza is a great success.
DonQui’s first pizza is a great success
His first attempts to try this at home are OK but not brilliant. The base ends up a bit ‘doughy’ rather than light and crisp.
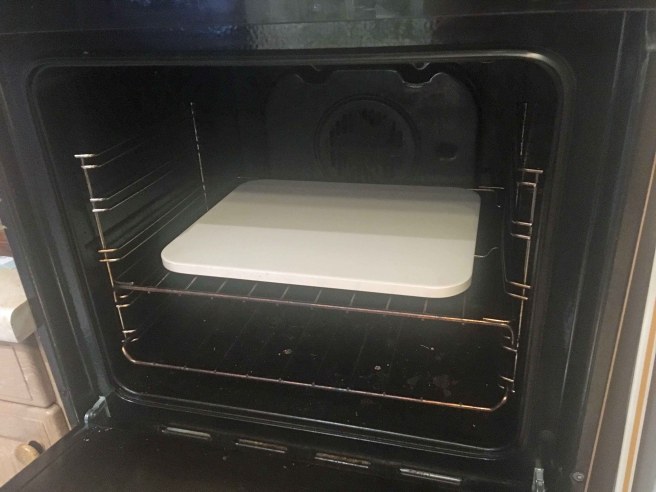
A pizza stone in a home oven can help to form a crispy base
Even with the addition of a pizza stone, his home oven with maximum temperature of 250º does not quite do the job.
Blind baking the base helps when using a low-temperature home oven
With further experimentation he finds ways to overcome this. Blind baking the base for 3 minutes before putting on the toppings is his first break-through. This gives a crispy crust at the lower temperature of his home oven. Adding a small amount of dried yeast as well as sourdough levain aids rising and makes the base lighter.
Italian strong, fine, flour transforms DonQui’s dough
Perfection, however, is only achieved when he tries using strong Italian 00 (super-fine) semolina flour. This flour — made especially for pasta and pizza — utterly transforms the dough. It is almost immediately elastic and the resultant base is as good as he has ever tasted anywhere.
DonQui contemplates the task ahead
Here, below, is DonQui’s recipe based on the Two Magpie’s original instructions with his own modifications.
It makes two small individual pizzas or a single large one.
Ingredients
250g strong white bread flour
½ teaspoon dried yeast
140g water
95g sourdough levain (starter)
5g salt (a good teaspoonful)
10g olive oil
Method
The ‘shaggy dough’ is a sticky mess, With kneading it firms up
Combine the flour, yeast, water and levain by hand into a shaggy dough.
DonQui’s sourdough levain
Turn onto a lightly floured surface and knead until a smooth non-sticky dough has formed.
The formerly shaggy dough is strong and smooth after kneading
Add salt and continue kneading until all granular traces have gone. Slowly add the oil and work it in until fully incorporated and the dough is smooth and strong.
Two hours later it looks like this
Leave the dough to rise for 2 hours in a lightly oiled, covered container at warm room temperature (22-27ºC).
Separating into two portions
Cut the dough in half (makes approximately two 250g portions). Shape each into a tight ball and either use immediately or wrap in cling film and refrigerate for a maximum of 48 hours. The dough balls can also be frozen.
To use, bring the dough back up to room temperature (if refrigerated), work it a few times to check elasticity by gently stretching and folding. It should be possible to do so without the dough immediately breaking apart.
The stretched dough on baking parchment
Let rest for 20 minutes then stretch into shape on a lightly floured surface. The final stretch is best done on parchment paper so that the base does not end up sticking to the board.
Blind bake at maximum temperature in a pre-heated oven (250º C at least) for 2-3 minutes on the parchment paper. Using a pizza stone will give a crispy base but be sure to put the stone in a cold oven or it will crack.
Remove from the parchment paper. Put on toppings when cooled.
Bake at maximum temperature for 6 minutes directly on the pizza stone. This will give a crispier finish than if it was left on the paper.
DonQui is most pleased with what he has baked
The flour
Pizza dough is best made with Italian Tipo ‘00’ durum wheat flour. It is finer ground than normal and has a high gluten content. It will give the dough an incredibly smooth, firm, texture.
Canadian flour has high gluten
If using white bread flour, make sure it is a strong one that’s high in gluten. It is the high gluten which gives the essential firm elasticity. Look for Canadian flour which has a higher gluten content than most European ones. Normal all-purpose flour will simply not do the job.
Pizza and pasta flour
Some millers in the UK are now producing pizza flour which combines Italian style fine grind with local high gluten wheat.
It has been a while since DonQui Oaty returned from Sicily. Back in his home paddock he has continued to experiment with some of the foods he discovered while he was away, doing his best to recreate them in his own kitchen.
One of the most interesting and unusual dishes he came across in Sicily was pasta con le sarde or pasta with sardines. Probably dating back to the Arab conquest of the 8th century, it is unlike any pasta dish DonQui has ever tasted. Saffron, raisins, pine nuts, almonds and wild fennel bring the tastes of North Africa and the Middle East to merge with Sicilian cooking.
DonQui’s first taste of pasta con le sarde at Trattoria La Locanda, Piazza Armerina
What follows is DonQui’s version of the ancient recipe. He is rather pleased that it turned out as good as what he had sampled in Sicily.
Ingredients for 2 people
The ingredients
1 small onion, finely chopped;
2-3 anchovy filets, cut into pieces
2-3 sardines (ideally fresh), filleted and cut into pieces
a bunch of fresh wild fennel tops (or a tablespoon of dry wild fennel)
a good pinch of saffron strands lightly pulverised with a pestle and soaked in a little boiling water
a glass of dry white wine
a handful of currants or sultanas soaked in water for 20-30 minutes (currants are traditional)
a handful of toasted pine nuts
a level tablespoon of ground almonds
a teaspoon of tomato purée (tomato paste) dissolved in a little water (optional and not traditional)
olive oil
water to dilute
salt and pepper to taste
a handful of toasted breadcrumbs
150g dried bucatini, linguine or spaghetti
Notes
Wild fennel (finocchio selvatico) is not easy to come by outside Sicily and it is quite different from cultivated fennel. DonQui uses some dried finocchio selvatico he brought back from his travels.He understands that a reasonable substitute can be made from dill along with ground fennel seeds.
Fresh sardines are best. They are not in season at the moment so DonQui uses tinned sardines preserved in oil as a reasonable substitute.
Method
Pour boiling water over the saffron and the sultanas or currants and let them sit for 15-30 minutes. This allows the dried fruit to re-hydrate. It also brings out the saffron flavour and colour from the strands.
Gently toast the breadcrumbs in a dry pan on medium heat until they turn golden.
Fry the onions in oil until they soften and begin to colour.
Adding the sardines and anchovies
Add the sardine and anchovy pieces and continue to gently fry. The fish will break up and begin to dissolve (approximately 3-5 minutes on a low-medium heat)
Add the wine and reduce
Turn up the heat and add the wine, letting it boil off until reduced by about half.
Then add the fennel and the saffron (with its soaking water). Cover and simmer gently for about 10 minutes.
Strain the sultanas/currents from their soaking water and add them to the sauce along with the ground almonds, diluted tomato purée, and half the pine kernels. The almonds and tomato purée will thicken and bind the sauce. Add a bit of water to dilute as needed.
Bring the sauce back up to a gentle boil and simmer for about 5-10 minutes uncovered to allow the flavours to come together. Stir frequently to avoid scorching, adding more water if needed to dilute. Taste for seasoning, adding salt and pepper according to taste.
Meanwhile prepare the pasta in salted boiling water until done (about 12 minutes) then strain. If you have a good supply of wild fennel add some to the pasta water.
Mix the pasta into the sauce over the heat
Tip the strained pasta into the pan with the sauce and mix it together well. Add a dash of the pasta cooking water to dilute and keep everything moist.
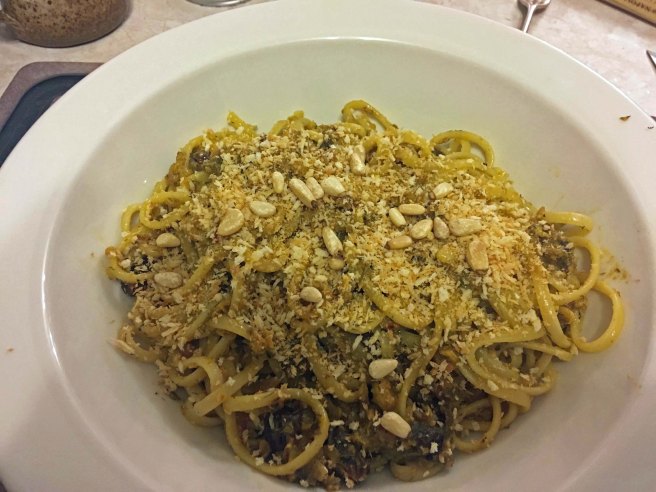
Turn into a serving dish, sprinkle with the toasted breadcrumbs and remaining toasted pine nuts. Then serve.
In some parts of Sicily the final dish with the breadcrumb topping is put into a hot oven for a few minutes to crisp up. DonQui has not tried it this way yet so cannot say if it is an improvement or not.
The result is an astounding combination of flavours which DonQui highly recommends.
DonQui’s pasta con le sarde is served
Duchess was quite taken a-back on first tasting but the more her tastebuds became accustomed to the flavours the more she liked it. She thought capers might be an interesting addition and although they are not a traditional ingredient, she may well be right.
A little extra virgin olive oil served on the side makes an excellent addition. A little drizzle seems to bind the flavours beautifully. Do not be tempted to add any cheese — it would clash horribly with the taste.
A crisp southern Italian white wine makes an excellent accompaniment. DonQui chooses the Gambino Winery’s Tifeo bianco, made from Carricante and Catarrato grapes grown on the slopes of Mt Etna. It is a perfect match.
Duca di Castlemonte is an old farm estate now converted into an excellent country restaurant and guest house.
DonQui Oaty’s first lesson is in making a traditional Sicilian spiral pasta (busiate).
Roll out a thin finger of dough
This is done by rolling out a thin finger of dough then gently rolling it around a wooden stick to produce an elegant spiral. The stick is first dipped in flour to stop the dough from sticking to it.
Make the spiral by rolling it around a kebab stick
DonQui takes his time with the first one, learning that it is best to make them quite thin and not too long.
DonQui begins to get the hang of it
Once he gets the hang of it he is able to produce them with confidence but it is a time consuming process which would be best done with several willing helpers. DonQui is fortunate that the dough (hard flour and water — no eggs) is pre-made for him.
The sauce is a Trapanese tomato pesto. The ingredients (for two) are:
2 pealed garlic cloves
approximately 2 tablespoons of blanched, lightly roasted almonds.
a small bunch of fresh basil (torn up)
a pinch of salt and pepper
a generous glug of olive oil
pulp of 4 red, ripe tomatoes; peeled, seeded and roughly chopped
Peel the tomatoes by first immersing them in boiling water
To peel and seed the tomatoes: score the skin in quarters, cover with boiling water for about 5 minutes then let cool. The skins will peel off easily. To de-seed, squeeze the tomato over a bowl and the seeds and excess liquid will come out leaving just the pulp.
Method:
Use a mortar and pestle to make the pesto
Prepare the pesto by first mashing up the dry ingredients and garlic, with a mortar and pestle, until it forms a sort of paste. Add the torn basil and pound together a bit more until well blended.
After adding the tomatoes and olive oil
Add the tomato pulp and olive oil then mash it all together until well mixed. Set to one side.
Cook the pasta in salted boiling water (You don’t necessarily need to use home-made pasta). Drain and tip out into a bowl and mix in the pesto.
The completed dish
Serve with a good sprinkling of chopped roasted almonds on top then enjoy.
It is one of the most divine pasta dishes DonQui has had the opportunity to taste. In his view it does not benefit from the addition of cheese.
For many people, and the odd donkey, 7 is a lucky number. The recipe that follows must be very lucky indeed as DonQui makes it with seven vegetables and seven spices.
Couscous with seven vegetables
This is DonQui’s take on a traditional couscous from Fez, adapted from Paula Wolfert’s excellent book: Couscous and Other Good Food from Morocco. DonQui’s recipe differs from the traditional in two ways.
Firstly he uses no meat while the original contains both chicken and lamb. This is not because DonQui is a vegetarian — he is anything but. Rather it is because he is cooking for just two people, not a vast horde, and very occasionally he likes to experiment with vegetable dishes.
Secondly he likes his vegetables crisp and crunchy while the vegetables in most traditional Moroccan couscouses are cooked to the point where they are soft and soggy. This is because the vegetables (and meat) are used to produce a deep rich bouillon. It is the sauce that is important rather than the the individual ingredients that are used to make it. DonQui’s recipe tries to balance both — crisp, crunchy vegetables as well as a deep rich sauce.
Ingredients (for two people)
1 cup of dry couscous
500 ml chicken stock
500 ml lamb stock
1 small tin (250 g) of chopped tomatoes or 2 fresh large tomatoes peeled and chopped
a bunch of chopped coriander leaves (cilantro)
a bunch of chopped parsley
½ cup of dry chickpeas (garbanzo beans) soaked overnight
a handful of raisins
a handful of blanched almonds
salt to taste
harissa to taste
lemon juice to taste
a mix of butter and oil for frying
The seven spices
½ tsp ground coriander seed
½ tsp ground cumin seed
½ tsp turmeric
½ tsp dry ground ginger
1 cinnamon stick
1 tsp ground black pepper
a pinch of saffron threads
The seven vegetables
DonQui parts from tradition here, using whatever is fresh and available as well giving a good colour balance rather than sticking to traditional Moroccan vegetables. This time he uses:
1 onion, finely chopped
1 small courgette (zucchini)
4 baby sweet corn
6 sprigs of tender stem broccoli
3 carrots
a handful of fine french beans
a bunch of broad beans (later podded).
The onion is essential but the other vegetables are entirely up to your taste. Turnip is a traditional vegetable in Moroccan couscous and it adds a nice peppery flavour to the sauce. Unfortunately there were none available in his local shop when he made this dish. Normally he would try to include it.
Notes: DonQui uses a combination of chicken and lamb stock as the traditional recipe is made with both chicken and lamb. He sometimes uses only chicken stock. Alternatively if you want a vegetarian dish then you could use 1 litre of vegetable stock instead.
To peel fresh tomatoes, place them in a bowl and pour boiling water over them. Let them sit for a few minutes and the skins will come off. It is easier if you quarter the tomatoes before peeling.
Method Note: This dish takes several hours preparation. DonQui usually starts in the morning for an evening meal. Most of the more complicated stages can be done well in advance to leave the final preparations to the last 30 minutes.
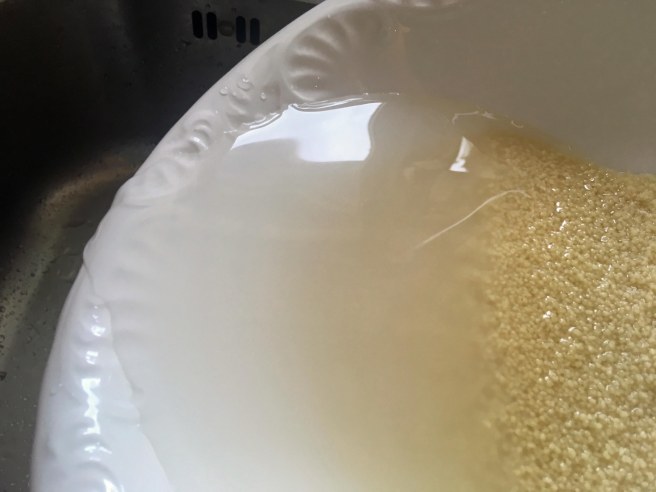
The couscous grains after washing and drying
Prepare the dry couscous by washing and drying as described in step 1 of How to Make the Perfect Couscous. This should be done several hours in advance.
Drain the chickpeas and simmer in boiling water for 1 hour. Then drain.
Fry the chopped onion and carrot in the bottom of a couscousiere
In the bottom of a couscousiere gently fry the chopped onion in the butter and oil until it begins to colour. DonQui also likes to add one chopped carrot as well.
Add the chickpeas and spices
When the onion-carrot mix begins to colour but before it burns, add the chickpeas and all the spices. Stir for about a few seconds over a medium heat.
Add the tomatoes and herbs
Add the tomatoes, salt, coriander and parsley, stirring continuously so that the mix is well blended but does not scorch. The add the stock and bring to the boil.
Place couscous in the top half and steam
Place the couscous in the top half of the couscousiere and steam over the mixture for 20 minutes as described in step 2 of How to Make the Perfect Couscous.Up to this point everything can be done well in advance and it is better to do so. You can then set everything off to one side and make the final preparations without time-stress.
Thirty minutes before you wish to serve, add the raisins to the mixture in the bottom of the couscousiere and bring back up to the boil. Place the pre-prepared couscous back on top to steam another 20 minutes as described in step 3 of How to Make the Perfect Couscous.
The original 1 litre of stock will have reduced considerably by the end of this stage but it should be enough to continue to steam the couscous while forming a rich broth. If it looks like it is evaporating too much then add a little water.
Gently fry the blanched almonds in butter until they turn a golden brown. Tip out on a plate covered with paper towels to dry and set aside to dry.
Prepare the vegetables
Meanwhile prepare the fresh vegetables by cutting the larger ones (carrots and courgette) into julienne style batons about 3 cms long. Cut the french beans in half widthwise and slice larger baby corn in half lengthwise. Cut off the thicker parts of the broccoli stalks. Although not essential, broad beans are best if you remove the outer skin of the individual beans after podding. This is best done by blanching for a minute or two, pinching an opening in the outer skin and then squeezing the tender inner bean through it.
When the couscous has steamed for 20 minutes add the carrots to the broth and continue to simmer for 2 minutes more. Then add the baby corn, broccoli and beans, and simmer for 3 minutes. Finally add the courgette for a final 2 minutes. In this way the carrots will have cooked for 7 minutes, the beans and corn 5 minutes and the courgette for 2 minutes. Adjust your cooking times to the individual vegetables and your taste. DonQui likes his still a bit crunchy and these timings give him that.
Make a well in the centre of the couscous
Tip the couscous out onto a serving platter. Fluff up with a fork (possibly adding a few dollops of butter) and form a well in the centre for the vegetables.
Strain the vegetables, reserving the broth. Tip the drained vegetables into the well of the couscous.
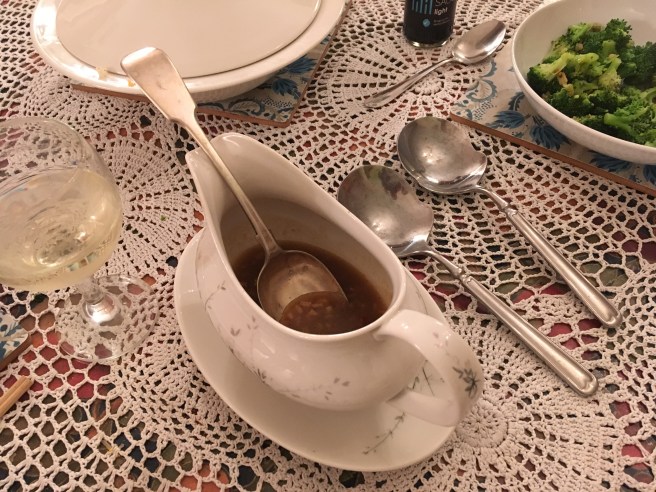
Serve the broth in a gravy boat on the side
Pour the strained broth back into the bottom of the couscousiere. Bring back up to the boil and immediately take off the heat. Add a dollop of harissa and a squeeze of lemon juice to taste and stir well. Taste for seasoning and pour the broth into a serving jug or gravy boat.
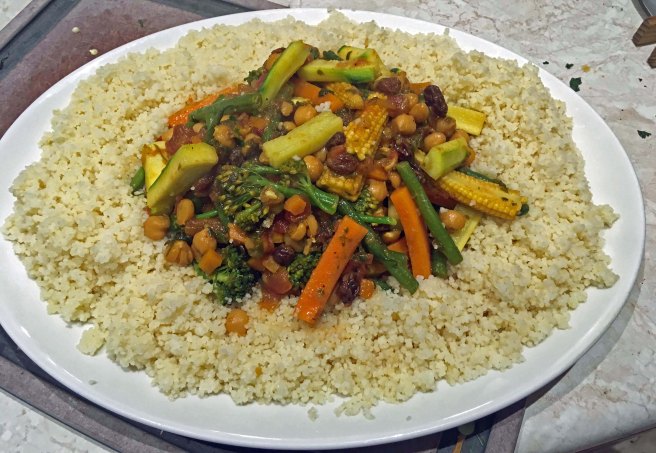
Sprinkle the fried almonds on top
Sprinkle the vegetables with the fried almonds and serve with the broth on the side.
Moroccan food must be counted amongst the world’s great cuisines. DonQui has been in love with it for many years and he enjoys preparing a Moroccan feast as much as he enjoys partaking in it.
DonQui’s copy of Couscous and Other Good Food from Morocco
His faithful guide to unlocking the secrets of this wonderful cuisine has been Paula Wolfert’s brilliant Couscous and Other Good Food from Morocco. The pages of his copy are now stained from use and the pages are coming apart. It is from these pages that DonQui discovered how to make delectable tagines as well as the traditional way of preparing couscous.
Couscous with Merguez and Vegetables
Couscous in the West is rarely prepared properly. Most instructions simply tell you to pour boiling water or stock over the couscous, let it swell for 5 minutes and then loosen the grains with a fork, perhaps adding a little butter. You can make couscous this way and it will be edible but the grains will swell to at most twice their size. Done in the traditional way the couscous grains will swell up to at least three times their original size without becoming soggy or lumpy. The result is a deliciously light, fluffy concoction — perfect for sopping up the deep rich bouillon in which the accompanying meats and/or vegetables are prepared.
Absorbing water in several stages produces a light fluffy couscous
The trick is to let the grains absorb water in three stages, drying out in between and steaming the couscous over the meat, vegetables and spices which will accompany it. You will need a couscousiere to do this. The process is simple but it takes time. DonQui is a great fan of the slow food movement and he is of no doubt the time taken is well worth the effort.
This is how it is done:
First Stage. Washing and Drying
They dry couscous at first seems to not be enough
Put approximately 1 cup of dry couscous for every two people in a large deep bowl. It will not look like much and DonQui often worries that it will not be enough. Fear not. It will grow to three times as much — or more.
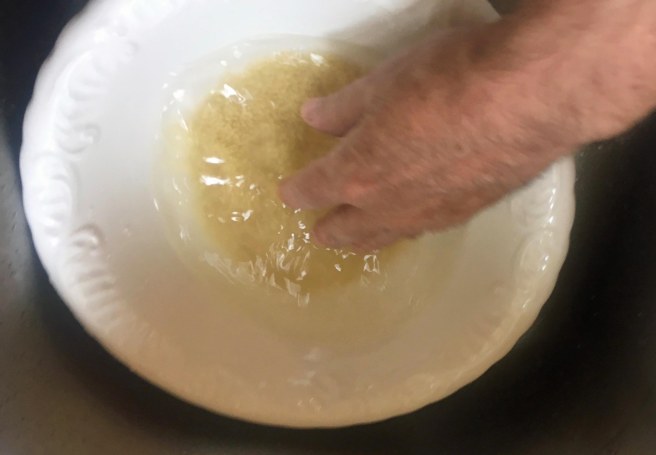
Swish the grains around in the water
Pour a good amount of cold water over it. DonQui never measures exactly but is should be more than enough to cover the grains and then some. Swish the grains around in the water for a few seconds with your hands (the water will then become cloudy).
Pour off the excess water
Gently pour off the excess water (no need to use a sieve) leaving the wet grains in the bowl to settle.
Set aside to dry
Set aside to let the grains absorb the remaining water and then dry. This will take about 30 minutes. You can let the couscous sit for as long as you like. DonQui often does this hours before he intends to start cooking.
Break up the grains once dry
When the grains are dry (this does not have to be done immediately) break up the couscous with your hands so that the grains are no longer sticking together. By this time the couscous will have expanded to about twice the original size.
Second Stage. The First Steaming
Place the grains in the top half of a couscousiere
Place the fluffed up couscous grains in the colander of a couscousiere on top of the food you are cooking to accompany it.
Ensure there is plenty of liquid in the bottom half of the couscousiere
You will need a good deal of liquid in the bottom half of the couscousiere as much of it will evaporate in the steaming process.
Steam for 20 minutes uncovered in a couscousiere
Bring the liquid in the bottom half of the couscousiere to a vigorous boil and steam the couscous on top of it for 20 minutes, uncovered.
Pour water with a bit of oil over the steamed grains
Tip the steamed couscous back into the bowl and immediately pour about ¼ litre of cold water with a dash of olive oil over the hot grains. Swish the bowl around for a few seconds then let it settle for the couscous to absorb the water. It is best to add the water in stages as too much at this stage may cause the couscous to become soggy.
Set aside to dry again
Set aside to dry as in the first stage. Once again this can be done hours in advance. By this time the grains will have expanded to three times their original size or more.
Third Stage. The Second Steaming
Break up the grains before the second steaming
Thirty minutes before you wish to serve, break up the couscous with your hands so that they are no longer sticking together and there are no lumps.
Again steam for 20 minutes
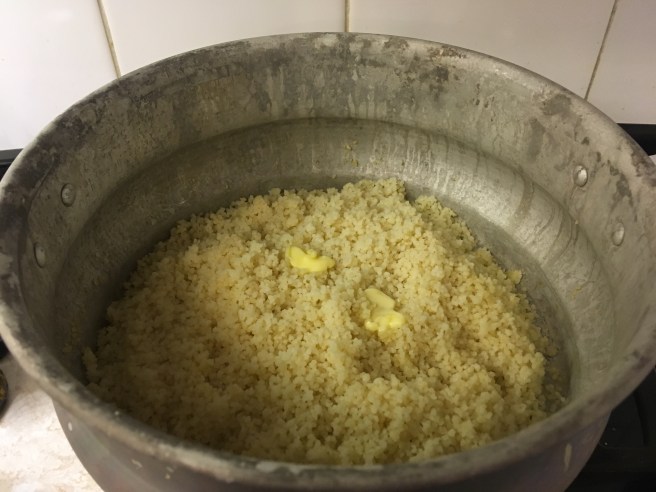
Once again steam the couscous for 20 minutes, uncovered, in the top half of a couscousiere. In the last few minutes DonQui often adds a few dots of butter.
The finished couscous
Tip out onto a serving platter and fluff up with a fork or two so that there are no lumps.
Either form a mound, over which the meat and vegetables can be placed. Or form a well in the centre for the same purpose. Then enjoy!
Serve the couscous with food it was steamed over
In his next blog, DonQui will give a recipe for a vegetable accompaniment which he recently cooked in the bottom half of the couscousiere as the grains were steaming. Over time he will add additional recipes.
If you only want light fluffy couscous (for a salad, for example). You could steam the couscous over a simple stock.
DonQui is no great expert when it comes to Chinese food. His experience of western “Chinese” restaurants has always left him feeling that he has yet to sample the full delights of one of the world’s great cuisines.
Of late he has been experimenting, trying for himself to discover and understand some of the basics of Chinese cooking. Thanks to the excellent book, Every Grain of Rice by Fuchsia Dunlop and some Chinese ingredients provided by one of his well travelled colts, DonQui is beginning to get somewhere and has started to create his own Chinese-style dishes and sauces.
Broccoli florets stir-fried with ginger and chilli
The following recipe for ginger sauce goes exceptionally well with broccoli which has been blanched for 2-3 minutes and then stir-fried with ginger and chilli. If using Chinese or tender-stem broccoli the whole stem can be used (cutting off the thicker ends of the stalks). If using ordinary western broccoli (as above) then use only the florets cut small.
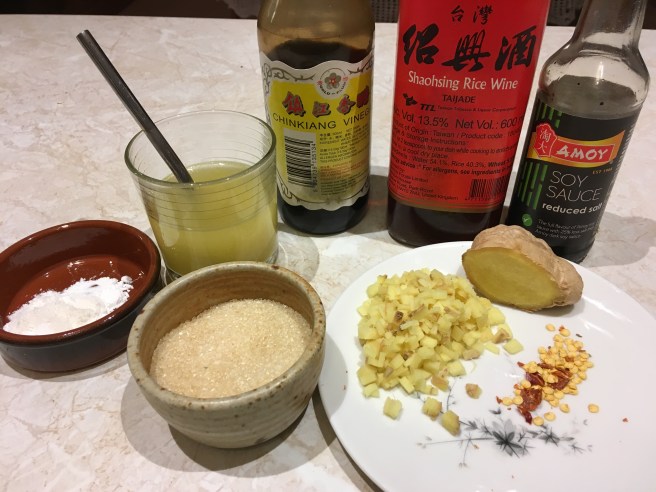
Ginger Sauce Ingredients
Ginger Sauce Ingredients
A good amount of fresh ginger root, pealed and finely chopped — about 2 tablespoons
½ – 1 teaspoon dried chilli flakes (depending on how hot you like your sauce)
A good splash of Shaoxing rice wine (about 1 tablespoon)
1 teaspoon Chinkiang rice vinegar
1 teaspoon light soy sauce
1-2 teaspoons palm and/or brown sugar (depending on how sweet you like your sauce)
100 ml low salt chicken stock (Chicken stock made from standard stock cubes is far too salty for this sauce according to DonQui. If you do use them then do not add any soy sauce without first tasting)
1 teaspoon of potato flour or corn starch mixed with water for thickening
oil for cooking (DonQui uses a mix of coconut and light rapeseed or light olive oil)
salt to taste Alternatives
DonQui gets his Shaoxing or Shaohsing rice wine and Chinkiang vinegar from China Town in London. If you cannot easily obtain them the best alternatives are dry sherry and balsamic vinegar respectively.
Ginger Sauce Method
Stir-fry the ginger and chilli
Gently stir fry the ginger and chilli until they begin to smell fragrant then add the sugar until it begins to caramelise. Add the rice wine and vinegar, mixing well and reducing slightly
Then add the stock and soy sauce, bring to the boil and simmer gently until well blended and reduced by about 1/3. Taste for salt and add more soy or a pinch of salt to taste
Reducing and thickening the sauce
Add the potato flour/corn starch mix and bring back up to the boil to thicken.
Set aside and warm up when ready to serve. The flavours deepen if the sauce is made well in advance. It is also makes an excellent dipping sauce (cold or warm) as an alternative to a sweet chilli sauce.
The finished sauce ready for serving
The broccoli florets with ginger sauce together with fried rice
Duck is one of DonQui’s favourite meats. He is also very fond of game.
Imagine his joy, therefore, at seeing a wild mallard duck at his local butchers. It was too much to resist so he picked it up, took it home and then did a bit of research on how to best cook the bird — this being his first attempt.
A wild mallard is much smaller than a farmed duck — just about perfect for two people. It also has very little fat. Unlike a domestic duck, there is no need to render the fat and the whole bird can be roasted rather than separating the legs and breasts. Because the bird is so small the best way to prepare it is by browning it all over in a hot pan and then finishing it off in the oven.
This is DonQui’s recipe.
Ingredients for the roast mallard for two people
1 wild mallard
1 onion quartered
2 carrots roughly chopped
1 garlic clove peeled and halved
1 lemon cut in half
A good bunch of fresh thyme
Salt
Oil and butter for cooking
Accompaniments (all optional)
1 apple cored and left whole with the skin on
Butter, raisins and a splash of rum to fill the inside of the apple
A handful of dried porcini mushrooms, soaked for at least 30 minutes
A good splash of red wine to deglaze the pan
Wild rice
Seasonal vegetables
Cranberry sauce
Method
Take the duck out of the fridge at least one hour before cooking so that it comes to room temperature.
Pre-heat the oven to 200º C. Meanwhile rub sea salt all over the duck, including the cavity. Salt on the skin will help to crisp it as well as adding flavour.
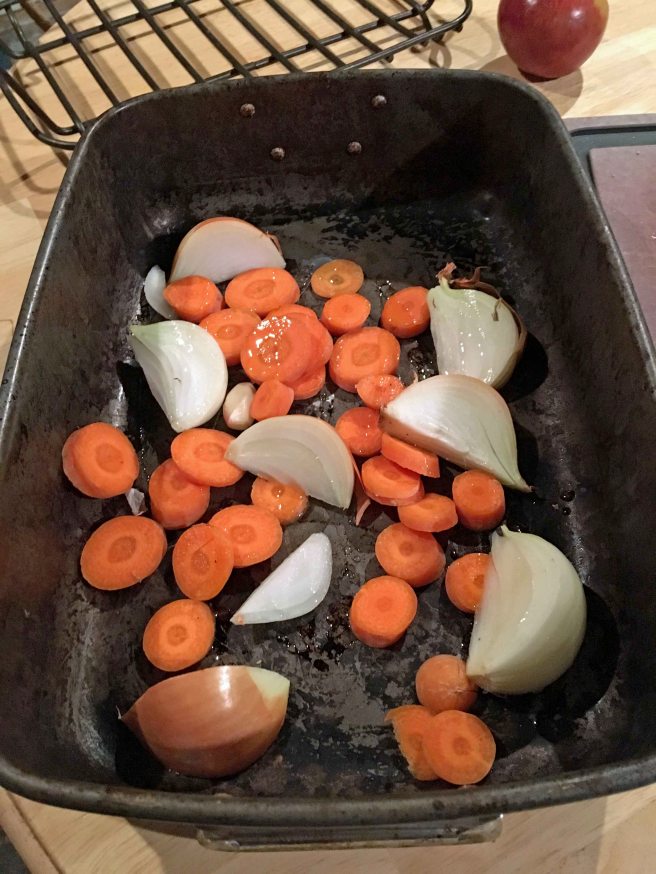
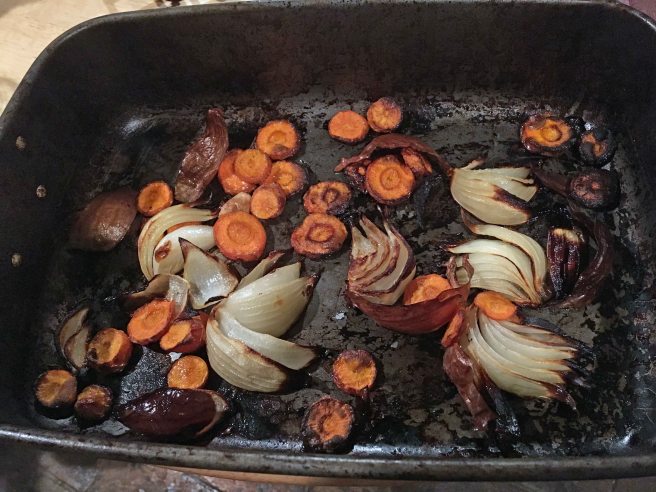
Place the quartered onion, chopped carrot and garlic in a roasting pan, douse with a little oil and place in the heated oven to roast for 30-45 minutes until the vegetables are nice and dark but not burned.
As the roasting time for the duck is only 12-15 minutes, DonQui does this in advance to help create a deep rich sauce. Otherwise the vegetables will not imbue the dark roasted flavours to the sauce. Take the vegetables out of the oven once they are nicely roasted and set aside.
Put the soaked wild rice on to boil and then simmer about 45 minutes before serving. DonQui’s method for cooking wild rice is fully explained here. Once cooked the drained rice can happily sit in a lidded pot, off the heat, and will remain warm for at least 15 minutes if you do not get your timings right.
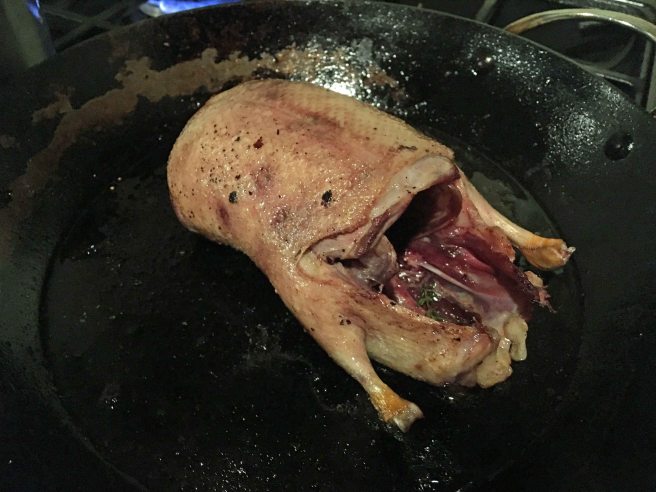
Once the vegetables are out of the oven, heat a mix of butter and oil in a large, heavy frying pan. Butter will give flavour and the oil will prevent it from burning. Brown the duck on all sides using tongs or a large spoon and fork to turn it. This will take about 10 minutes.
Take the bird out of the pan. Place it on a rack above the vegetables in the roasting pan. Then stuff the cavity of the duck with the halved lemons and sprigs of thyme. This will add flavour to the bird and the lemon will steam it from the inside while it roasts. Add the cored apple stuffed with butter, raisins and rum to the rack.
Put the roasting pan with the duck and apple above the vegetables into the oven and roast for 12-15 minutes. After 15 minutes the meat will still have some pink to it but more than that will cause it to dry out and toughen up. Twelve minutes will be just enough to cook through leaving the meat a little rarer.
Place the duck on a carving board, cover with tinfoil and a couple of tea-towels (dishcloths) and let it rest for 10-20 minutes. In this time the duck will continue to slowly cook from the inside out. This will even the cooking process which up to now has been from the outside in. If you do not rest for at leat 10 minutes the meat will not be properly cooked.
Cook the accompanying vegetables and make the sauce while the duck is resting.
To make the sauce, deglaze the roasting pan with a good splash of red wine over the roasted vegetables, stirring it all up over a low heat and scraping up the brown bits. Then strain the liquid into a pre-prepared gravy base. As the wild duck has very little fat there is no need to spoon anything off.
DonQui’s gravy base is a variation of his rich sauce. A simple alternative could be chicken stock thickened with a roux of butter and flour.
On this occasion DonQui decides to add some dried porcini mushrooms. As the duck is roasting he pan fries the soaked mushrooms in a butter-oil mix, using the same pan he browned the duck in without cleaning it. Then he adds them to the sauce along with the water they had been soaking in. This gives the gravy a deep earthy taste which perfectly matches the wild duck.
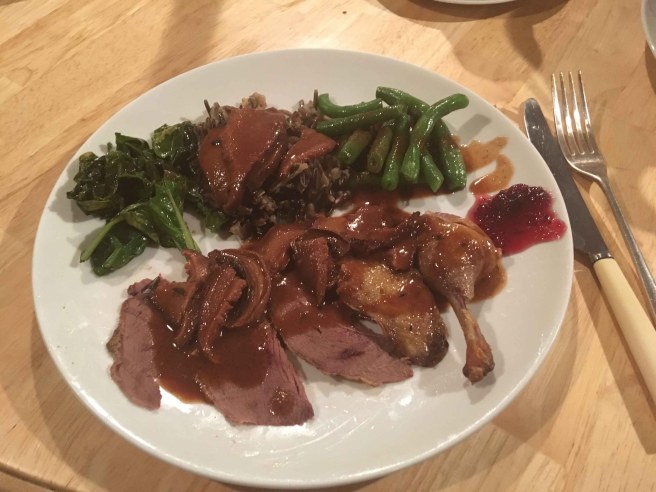
DonQui serves the duck with the wild rice, fresh kale from his allotment and french beans. Although not seasonal, he had picked the beans in season and froze them a few months ago. They were an excellent additional accompaniment.
As for the mallard — it was utterly delicious. DonQui will definitely try it again. Next time he will not bother with the baked apple. It is a traditional addition to a game bird, and went well with it, but DonQui thought the cranberry sauce was better and there was no need of two different sweet accompaniments.
DonQui advises looking out for pellets when eating a wild bird. He found three shotgun pellets in this mallard. He takes this as a good sign that the mallard will have been living freely as a wild bird should before succumbing to the hunter rather than the abattoir.